How to Run a New API Project With Mayhem in 5 Easy Steps
Welcome to Mayhem! In this blog post, we will walk you through the process of running an API project using Mayhem's powerful features.
Mayhem is an automated AppSec solution that analyzes your APIs and code, identifies defects, and provides comprehensive testing results, prioritized for you. By following these steps, you'll be able to monitor the performance and identify any issues in your APIs effectively.
If you don't yet have a Mayhem account, our Getting Started guide can show you how to quickly set one up.
Running a code project? See our blog post and video on how to run a new code project.
Let's get started!
Step 1: Accessing the Dashboard and Adding the API
To begin, log in to the Mayhem platform and navigate to the dashboard. On the left-hand side, you'll find the option to "Add a new API project." This is where we are going to start.
In the provided field, enter the URL for your API project. For demonstration purposes, we will use the provided demo URL in this guide. Click on the "Add API" button to proceed.

Step 2: Adding the API
On this page, you will have the opportunity to name your project, verify the URL, and input your API specifications. Mayhem supports various formats such as OpenAPI/Swagger, Postman Collection, Exported Postman Collection, or HAR. Ensure that the paths to your specifications are accurate before continuing.
Choose the desired duration for your API run. You can either utilize the automatic feature or set a custom run time, depending on your requirements.

Step 3: Installing the CLI
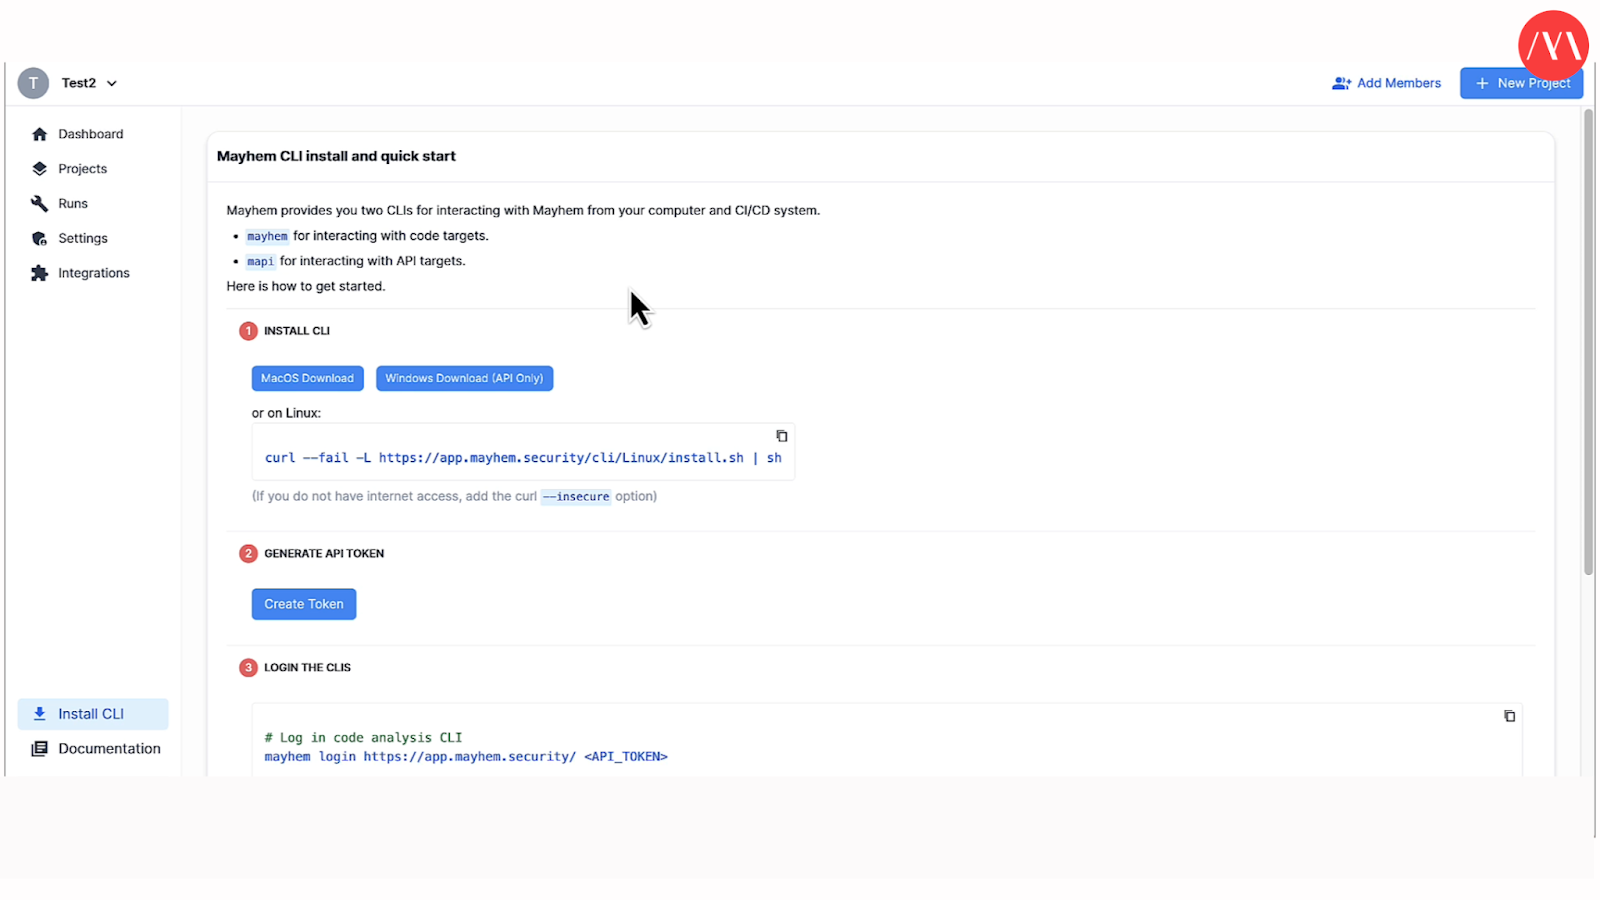
To proceed, install the Mayhem Command-Line Interface (CLI). The instructions for installation will differ based on your operating system. Click on “Install the CLI” underneath the “Auto” duration box, and follow the specific instructions provided for Mac, Windows (API only), or Linux.
Step 4: Initiating the Run
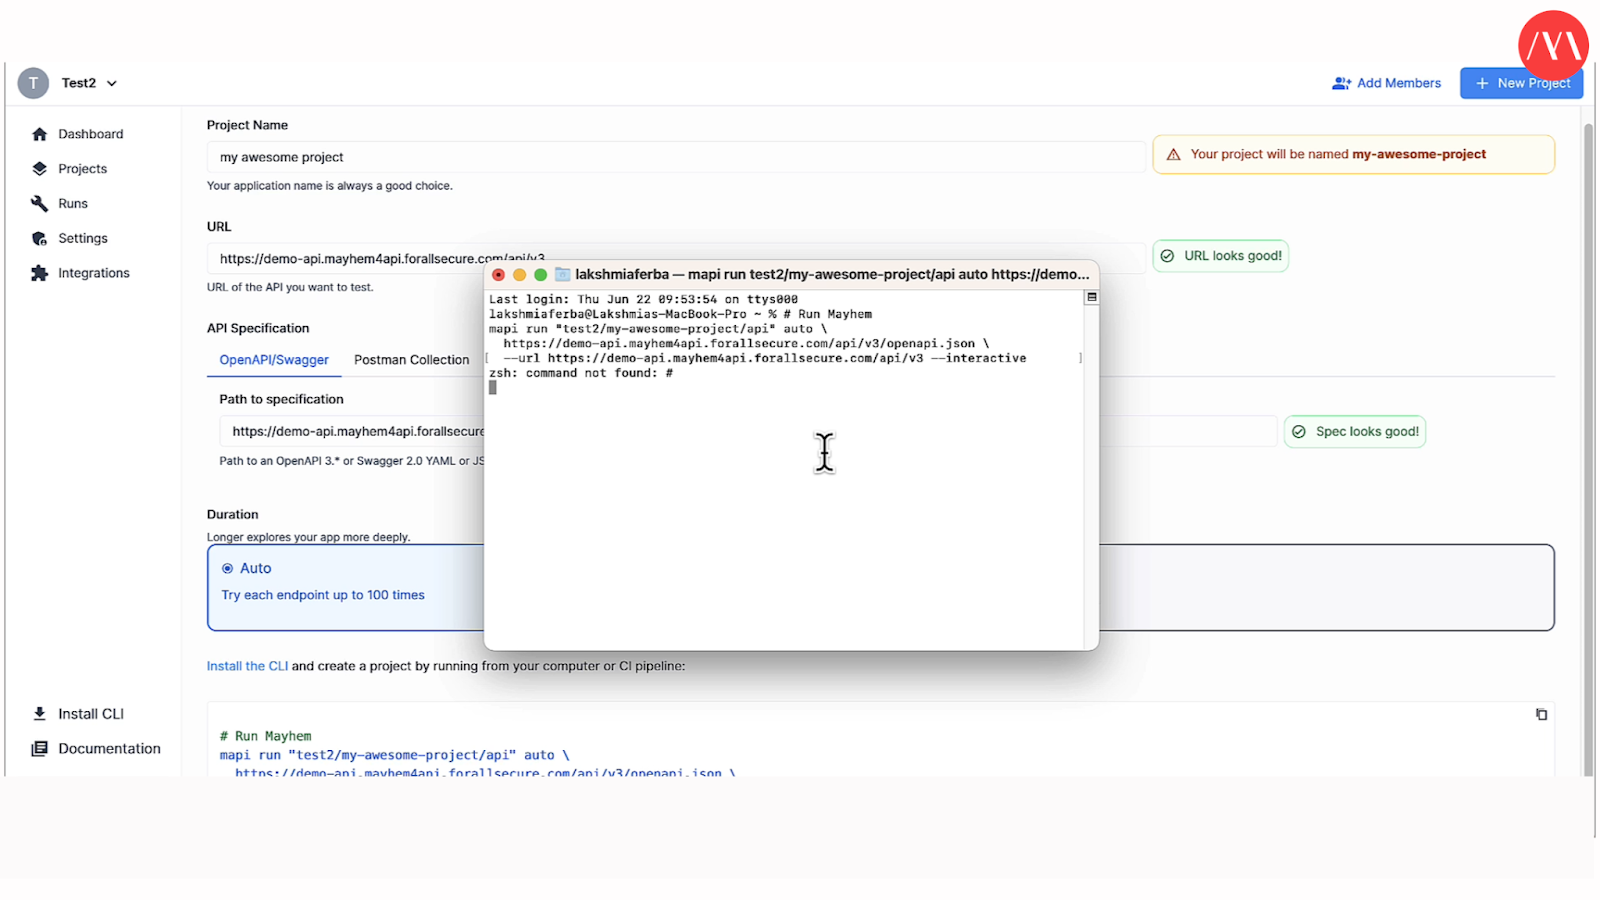
With the CLI installed, it's time to start your API run. Back on the project specification page, copy the provided command and paste it into your terminal. The run will commence immediately, and you can monitor its progress.
Step 5: Viewing and Analyzing the Results
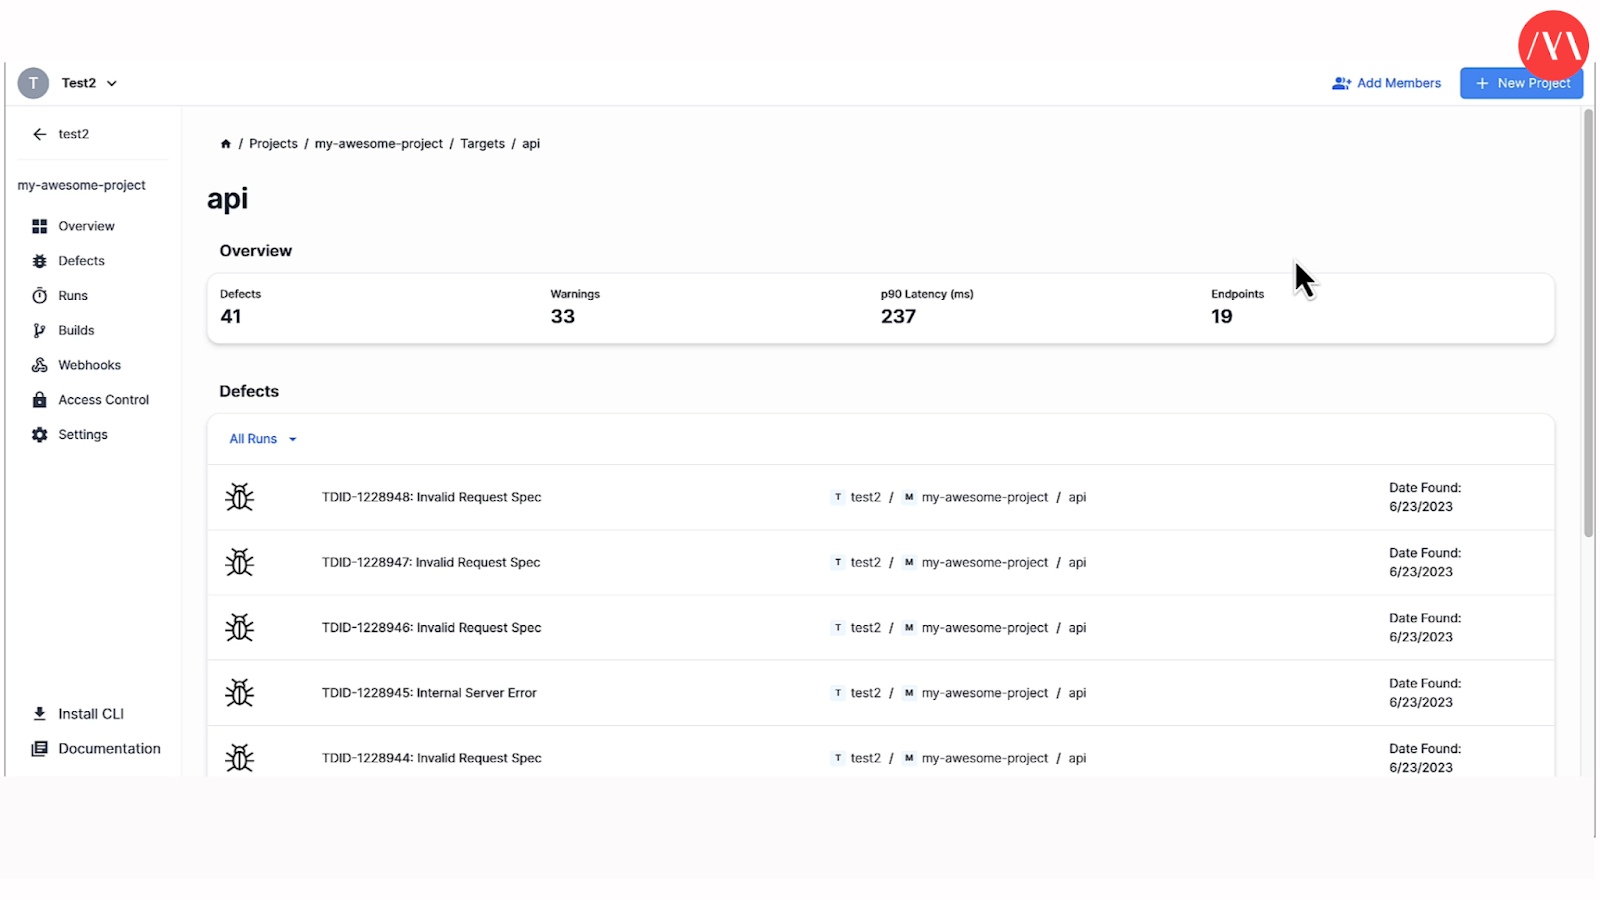
As the run progresses, navigate back to the Mayhem dashboard to view the real-time results. The dashboard will display the outcomes of the run, including the number of defects, warnings, P90 latency, and the total count of endpoints.
No Need to Sort Through the Results
Mayhem categorizes the results by errors and warnings, prioritizing the issues for you. By clicking on any of the results, you can access additional information such as sample requests, responses, and other relevant details. This functionality allows you to swiftly resolve any identified issues.

Accessing Run History
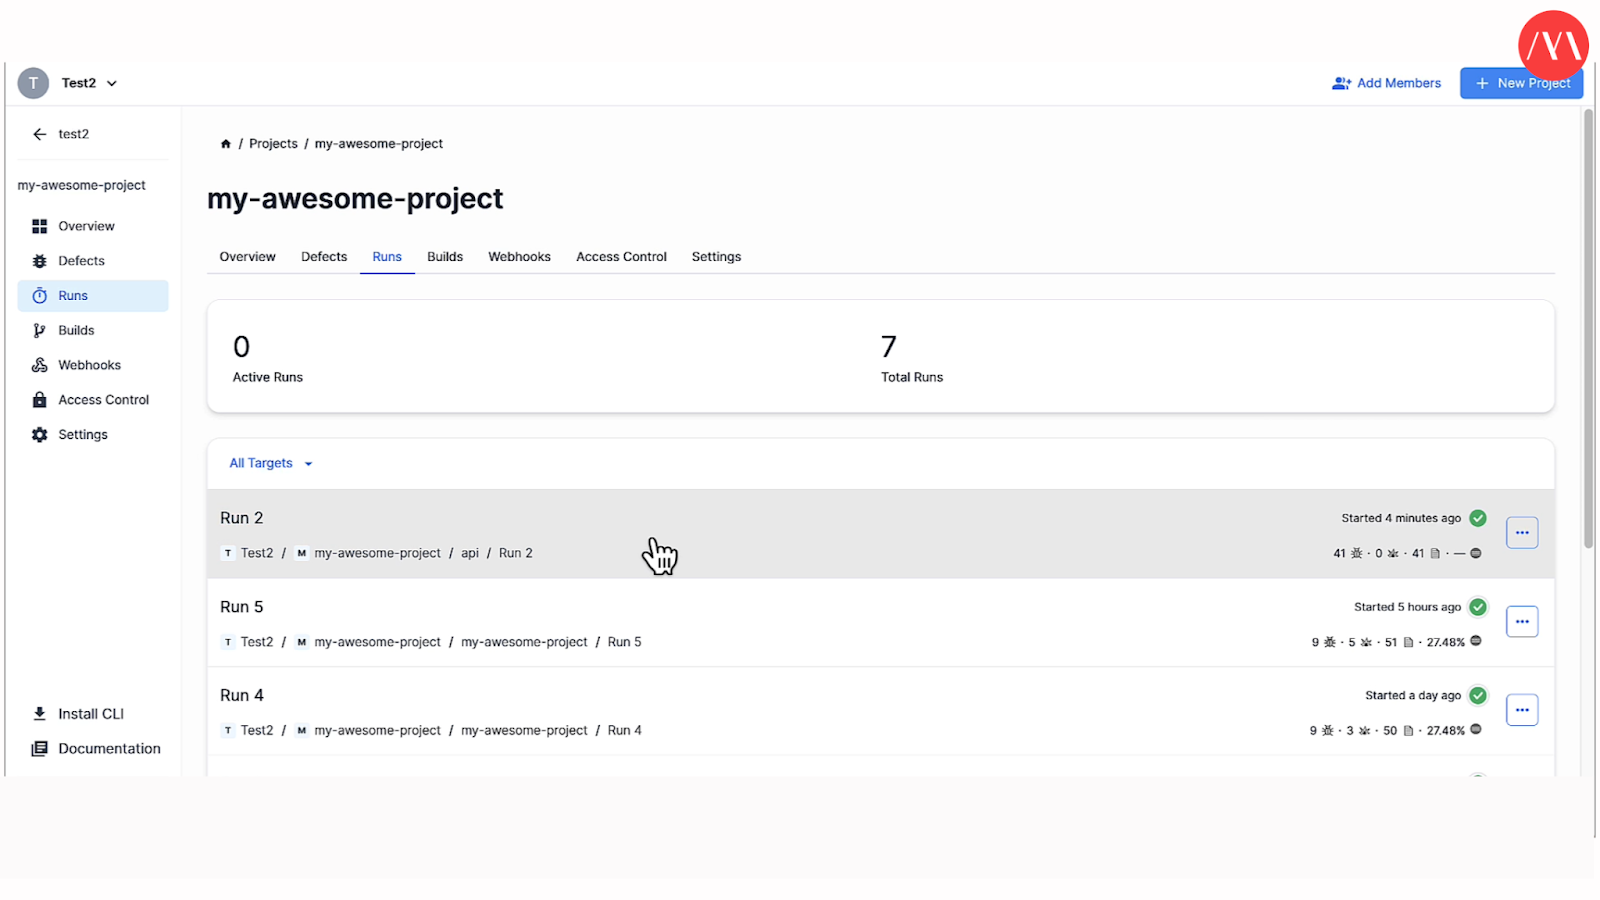
Under the “Runs” tab of the dashboard, you can find a comprehensive view of all your API runs. You can access this section to review previous runs, examine warnings, and track the progress of your project over time.
You’ve Completed Your First API Run With Mayhem!
Congratulations! By following these steps, you have successfully run your first API project using the Mayhem platform. You now have the knowledge and tools to identify and address any issues with your API endpoints efficiently.
Remember to monitor your API runs regularly to ensure optimal performance and maintain a high-quality user experience. Using Mayhem simplifies the process of analyzing and testing your APIs, allowing you to focus on creating software, not testing and sorting through API runs.
Start your journey with Mayhem today and experience the benefits of streamlined API and code analysis and testing.
{{api-cta}}
